Even though the first figure was difficult and didn't turn out near as well as I thought it would, I don't consider it a failure. But this one, surely is. It's true that it's not really my fault, since this was just a crappy Thai recast where nothing fit (not a single piece) and all except one of the 'clear' plastic pieces were not salvageable. It was clear from the start that this would suck, but I gave it my best shot. Anyways, I'm kinda ashamed of it even so, but I'm posting it still just for completeness. And a warning: stay away from Thai recasts from Ebay.
Showing posts with label figure. Show all posts
Saturday, September 5, 2015
4th Kit - Oreimo, Kuroneko and Kirino
After the third figure, I was feeling pretty bummed out. I mean, I had spent so much time creating something which turned out fugly. The fact that I knew, or suspected, that it would turn out fugly before I even started didn't make me feel any better. I needed something to cheer me up - a figure which I knew I would enjoy painting. So I chose this kit, simply because it had Kuroneko, and I love Kuroneko. It was also very simple, which just meant quicker gratification, and it was from e2046, which meant the quality was pretty good. All in all, it was going to be a breeze compared to the last one.
Or so I thought.
I had been growing weary of using regular spray paints for my figures. The last figure only emphasized what I already knew from the first figure, which was that normal spray paints (from Home Depot) spewed out inconsistent globs of paint, which meant that I'd end up with part of the piece being saturated and about to run, and another part would be not completely covered. This meant more layers, which hides the details and the lines in the cast. For me, the fewer layers of paint, the better. So to do this, I consulted Google, and ended up buying some Tamiya spray paints. I ended up liking the even and fine spray, but Tamiya paint had it's own problems.
Having a base coat isn't something new, but using Home Depot sprays, I never had to actually use a base coat because the paints always stuck to the PVC. However, I quickly found that Tamiya paints would not. I thought that I could spray a quick bottom coat, and then spray a thicker coat on top of that, but it turns out, not really. When I did that, the top coat ended up very uneven, and in one spot, the spray paint still wouldn't stick, like oil and water. It's likely that the figure had some oil or solvent on it from the casting process, and that washing it off would fix the problem. I'm too lazy, so for this figure, I just applied more and more layers till it was covered. It was a huge pain, and next time, I decided, I'd just use a base coat, because I'm still too lazy to wash it.
In the second figure, Holo, I had used a regular Home Depot clear spray coat for the finish. It worked fine, but it still felt like the coat was uneven, like some areas got globs while some were thin. So I decided to upgrade my spray paints to Montana brand - I purchased an acid-free varnish spray made from an acrylic base. I paint acrylic, so I wasn't worried about it. I should have been.
It's an acrylic based spray, from a very reputable, high quality brand so I wasn't concerned at all. Well guess what, everything I sprayed turned white. Not just a little white, really really white. Actually sometimes it was just a little white - so I thought that it depended on how thick the layer was, so I did some with really thin layers. Nope, still white. But then some colors didn't change color at all.... so I'm not sure what the connection is. All I really know is that I can never use it again. Waste of money.
Or so I thought.
I had been growing weary of using regular spray paints for my figures. The last figure only emphasized what I already knew from the first figure, which was that normal spray paints (from Home Depot) spewed out inconsistent globs of paint, which meant that I'd end up with part of the piece being saturated and about to run, and another part would be not completely covered. This meant more layers, which hides the details and the lines in the cast. For me, the fewer layers of paint, the better. So to do this, I consulted Google, and ended up buying some Tamiya spray paints. I ended up liking the even and fine spray, but Tamiya paint had it's own problems.
Lesson 12: Tamiya paints need a solid base coat.
In the second figure, Holo, I had used a regular Home Depot clear spray coat for the finish. It worked fine, but it still felt like the coat was uneven, like some areas got globs while some were thin. So I decided to upgrade my spray paints to Montana brand - I purchased an acid-free varnish spray made from an acrylic base. I paint acrylic, so I wasn't worried about it. I should have been.
Lesson 13: Don't use Montana Varnish
Round Five - Dont be shy, Nadia
So the ordering of these figures don't reflect when I start them, they reflect the order in which I finished them. Nadia I started and got a good way through at the same time I was doing figure three, Rei. But I put her aside while I completed the Oreimo girls. I've found that doing two figures overlapping allows me to have a break, when one is getting annoying or repetitive, or when one is drying and I can't do anything but wait. But the reason I put Nadia aside for a while is simply that I was looking forward to doing Kuroneko so much. That aside, I started working on Nadia again.
You might notice a crack or two in the belt - that's because when I moved, it got damaged and broke in several places, along with other less obvious damage
I can't really say that I learned anything during this figure. It was fairly simple - I couldn't spray anything so it was all acrylic paints. I didn't bother with fading or shading (because during this time I was very busy with wife being very pregnant and all), so it was all very simple and fast. The only complication is that this figure's hair was totally messed up. I had to cut and crop and break and still couldn't figure out how to make it all fit. In the end I managed to put them all together except for one piece which I basically just have sitting there on the side.
I did still have a bit of problem with the Montana Varnish, because I still attempted to use it. I mentioned that it didn't turn every color white, and Nadia's skin is a perfect example - I sprayed it and it looks fine. But her belt, who's color makes up much of Nadia's, did turn white. So again, I've no idea what the connection is.
I did gain a bit of experience with eyes, however. My first attempt painting eyes was with Rei - something I did intentionally to gain experience on a figure with which it didn't matter. So here, I was hoping to get it right. I think I did so so; it's not bad, it's not particularly good, but at least it's not bad enough that it distracts from the rest of the figure. And like I said, it was good experience. You need to practice practice before you can spew out good results. Speaking of good results, by the time the next figure came around, I managed to nail the eyes.
I can't really say that I learned anything during this figure. It was fairly simple - I couldn't spray anything so it was all acrylic paints. I didn't bother with fading or shading (because during this time I was very busy with wife being very pregnant and all), so it was all very simple and fast. The only complication is that this figure's hair was totally messed up. I had to cut and crop and break and still couldn't figure out how to make it all fit. In the end I managed to put them all together except for one piece which I basically just have sitting there on the side.
I did still have a bit of problem with the Montana Varnish, because I still attempted to use it. I mentioned that it didn't turn every color white, and Nadia's skin is a perfect example - I sprayed it and it looks fine. But her belt, who's color makes up much of Nadia's, did turn white. So again, I've no idea what the connection is.
I did gain a bit of experience with eyes, however. My first attempt painting eyes was with Rei - something I did intentionally to gain experience on a figure with which it didn't matter. So here, I was hoping to get it right. I think I did so so; it's not bad, it's not particularly good, but at least it's not bad enough that it distracts from the rest of the figure. And like I said, it was good experience. You need to practice practice before you can spew out good results. Speaking of good results, by the time the next figure came around, I managed to nail the eyes.
Wednesday, March 25, 2015
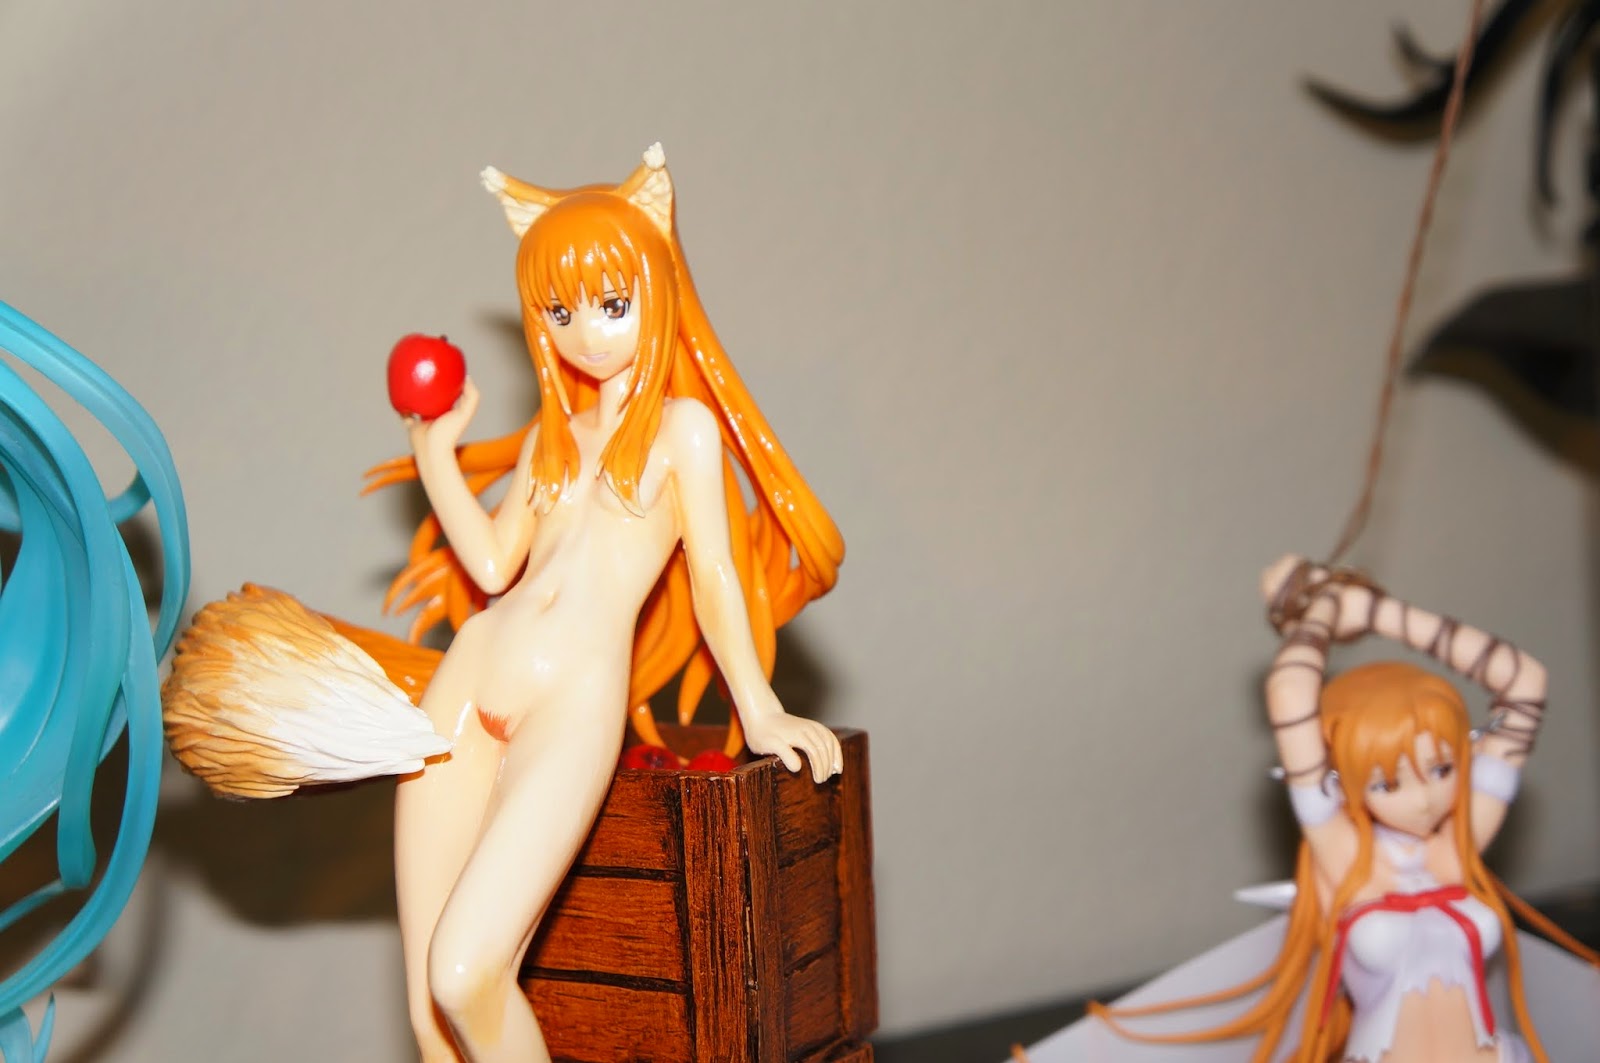
Round Two - First Success, with Holo
If you read my first post (this would be my second), then you know all about the crappily casted figure I had for my cherry kit. So with the first time, and all the mistakes usually involved, out of the way, it was time to move on to number two.
I mentioned in my last post that I purchased five figures from two Ebay sellers - but that's not true - because I forgot about a sixth figure purchased from a third seller. This sixth figure, unlike the other five, ended up being from a e2046-like seller - one which knew WTF they were doing and produced a kit which is as good as the original. I tried to find the seller, or the source of the figure, to no avail - so I don't know who to thank, or more importantly, who to buy some more from.
About the figure. This time, instead of using acrylics, because there was much more fading and gradient in this figure, I decided to use oil paints. So all the lessons I learned during this figure were about using oil paints. Except one.
I mentioned in my last post that I purchased five figures from two Ebay sellers - but that's not true - because I forgot about a sixth figure purchased from a third seller. This sixth figure, unlike the other five, ended up being from a e2046-like seller - one which knew WTF they were doing and produced a kit which is as good as the original. I tried to find the seller, or the source of the figure, to no avail - so I don't know who to thank, or more importantly, who to buy some more from.
About the figure. This time, instead of using acrylics, because there was much more fading and gradient in this figure, I decided to use oil paints. So all the lessons I learned during this figure were about using oil paints. Except one.
Lesson 3: Using the oven to reshape the PVC
The first figure, as well as the third, were both RESIN. Which I am told does not reshape so easily. But this figure was good ol' PVC, so I accidentally discovered that I could reshape (bend it) by sticking it in the oven on 150F for a few hours. I'm sure I could have turned it up higher but I didn't want an accident. But it was super simple, and at that temperature, there was no "melt", where small pieces get really out of shape. So pop it in, take it out, bend it.
I say that this was an accidental discovery because I didn't stick it in the oven to bend it. I stuck it in the oven to dry the oil paint.
Lesson 4: Dry the oil pain in the oven overnight
Because I used oil paints on this figure, I discovered that even after three days in the open, the paint remained "wet". I read a bit later that this is actually a feature of oil paints - painters don't have to rush. And it's true, acrylics dry way too fast, but I'd say a few days is a bit slow. I can't image how long this figure would have taken if I had to wait a week for the pain to dry. So I did a little research, and found out that heat would make it dry faster. So I took the risk, put the oven on low, 150F, and left the figure's leg in the oven overnight. And low and behold, the next day, full 24 hours later, I take it out and it was dry as a bone. Excellent!
Following that little discovery, I was able to move fast and get the figure base layer done. If you didn't know, I like painting a base coat on all the figures, over which I paint on a second layer which would include any fading, shading, or gradients. There's an occasional third layer for the small bits or the accessories. The body, the bag, the apples, the hair, and the tail were all rather straight forward. I did mess up on the tail and have to redo it, but again it wasn't tricky.
Lesson 5: Dry wipe (oil)
Watching youtube, I discovered a technique I liked and tried to great success in this figure: the dry wipe. Basically, I pain a base layer, dry it, then paint a top layer, and wipe it off lightly soon afterwards. I did this for the boxes and the apples in the boxes (even though you can't really see them ... a lot of effort for bits you can't even see). I like it so much I tried to redo the bag with the technique, and it turned out ok, but wasn't near as good.Lesson 6: Acrylic dry wipe
It worked sooo well, I wondered what would happen if I used acrylic to the same affect. I noticed that the oils created a fairly thick color difference with the dry wipe, and I thought that acrylics would be able to produce something similar but with a thinner color. As it turns out, I was right, but boy did I come close to messing it up. As you know, acrylics dry fast, but I was not prepared for just how fast they would dry before they just wouldn't wipe off at all! So the wipe affect didn't work near as well, but it turns out, it was exactly what I needed. With acrylics, apparently the thicker areas wipe off better, since the medium has takes longer to evaporate, whereas the thinner areas dried faster and just wouldn't wipe off unless I wiped within a few seconds. Anyway, you can see for yourself - the stones were done with a base coat of black acrylic, a top coat of grey oil paint, and a highlight using the wipe method with a white acrylic paint. I made the middle layer of grey oil paint because I thought it would help keep the white acrylic from drying so fast - turned out that it didn't work.
Labels:
anime,
figure,
garage kit,
Holo,
Horo,
painting,
Spice and Wolf
Subscribe to:
Posts (Atom)